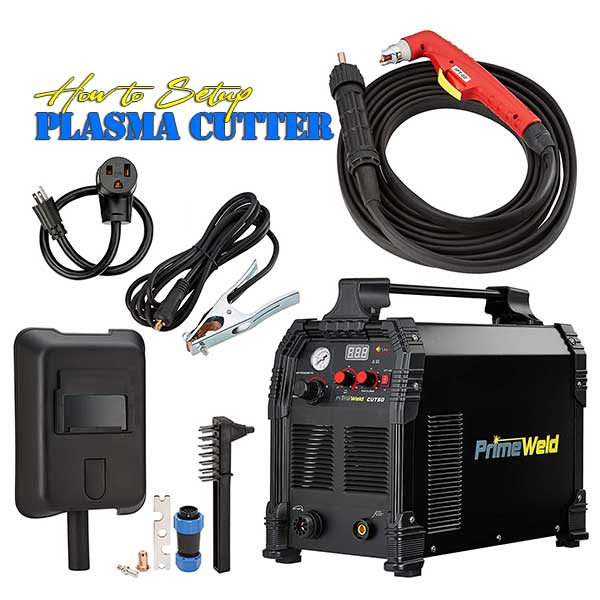
Setting up the process of a plasma cutter is not an easy fish to fry, especially for beginners. The right use of the device significantly depends on the setup process. That is why it is crucial to know how to set up a plasma cutter.
Before setting up a plasma cutter, there are important considerations that need to be kept in mind. Moreover, a few vital steps are airflow setup, cutting head adjustment, and cutting direction selection.
I have simplified the steps making it effortless for both professionals and beginners. Read through this guide carefully.
How to Setup a Plasma Cutter – Step by Step
Table of Contents
Preparation is the key to getting a good cut using a plasma cutter. The below steps will help you set up a plasma cutter properly.
Step 01: Consideration Before Operating a Plasma Cutter
- Make sure that the plasma cutter is clean and dry
- Grease application is necessary to ensure smooth operation
- Choose an air pipe minimum length of 12mm. Also, ensure that the airflow is enough to operate the plasma cutter.
To confirm the required airflow, use an air compressor. Instead, cut down the gas wire length. This will increase the wire radius and provide enough airflow to use the machine.
- In the air compressor, an oil and water separator should be available.
Oil or water in the pipe will provide a dirty cut. Moreover, proper ignition will not happen. In such a situation, the cutting tube needs to be removed. Then clean the electrode and reinstall it. Besides, turn the plasma cutter power off.
- Grab the Y-axis parallel and push it to the plasma cutter head. Once the device reaches the stroke point, the control source must be turned off. Then, pull the X-axis hand to the latch point to take parallel.
Now, switch the power on. Next, push the X-axis up. The reset button must be pressed if the device doesn’t turn on. Finally, move through the handle by making the arrow before releasing the reset button.
Step 02: Plasma Cutter Preparation
Carefully inspect the cutting torch before using the device. The cutting torch should be perpendicular and straight to the cutting table. Thus, prompt use and handling of the cutting torch with the electrode will be easier.
Also, remember that the cutting torch requires to be fastened to the shelf. You can prevent deviant cuts and get quality cuts.
A nozzle and a cooling fan are optional for rapidly cooling the metal after cutting.
Step 03: Airflow Set Up

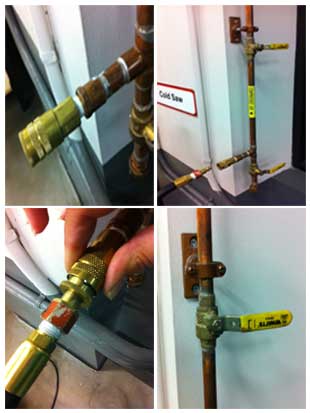
If you have a separate air compressor, connect it to the plasma cutter. The Air compressor confirms high pressure for a stable stream of plasma.
For fitting connections, remove the negative (-) connections outer flange, and the positive (+) connection needs to be inserted.
Now it is time to turn the airflow on. You will notice that the air pipe is positioned perpendicularly. Turn the lever 90° from the air pipe’s perpendicular position.
Step 04: Cutting Head Height Adjustment
Cutting head height adjustment is crucial. Too near or too far away, the position of the cutting head will tilt your workplace. So, the suitable height of the cutting head in contrast to the material’s surface is essential. The cutting head must be positioned straight to the metal’s surface at a suitable height.
Now you might be wondering how to know the appropriate height. The answer is available in the plasma cutter’s manufacturer’s instructions.
Select the right cutter type based on the target metal’s thickness and type. Also, parameters have to be set according to the cut chart.
Important Tip:
- A torch height controller can help you adjust the height automatically.
Step 05: Cutting Direction Selection
Compressed air flows in a spiral shape through the cutting head from left to right. It means the cutting direction of your targeted materials will be the right side.
Don’t forget to keep the material stable by setting it on the table. Also, the ground clamp should be closed to the plasma torch.
Step 06: Start Working with the Plasma Cutter
Don’t plug the plasma cutter in an electrical charge that is already turned on. If you are cutting an 18 mm metal piece, the current amperage has to be set to 25.
Now flip the switch of the machine to turn it on.
Then, by pressing the trigger, you can start cutting metal.
Congratulations! You have successfully set up a plasma cutter.
How to Get the Best Performance from My Plasma Cutter?
Buying a plasma cutter is not everything to get a precise cut. Your device will deliver the best performance when the below factors are confirmed.
1. Correct Consumables are the Key
Having the correct consumables is one of the most important things to get the most out of a plasma cutter.
You can’t cut all metals with the same consumables. Specific consumables are necessary for cutting each type of metal. Wrong consumables will give you ugly cuts, for sure. Simultaneously, your machine may damage diversely.
2. Air Compressor
Another important factor is if your plasma cutter doesn’t have a built-in air compressor, buy one without fail. The Air compressor provides compressed air that cools down the heated cutting tip, prolonging the consumable life. At the same time, cut quality will undoubtedly improve.
3. An Appropriate Surface is Required
An appropriate working surface is also crucial. Avoid working on a soft surface because your device can bob and weave, leading to inaccurate cuts. On the other hand, the machine can bounce if you work on a hard surface, causing inaccuracies.
So what is the appropriate surface?
Plywood or a piece of MDF will be an ideal work surface.
Last Notes
Undoubtedly, plasma cutters are one of the most commonly used cutting tools in every mechanic shop. They offer a wide range of advantages like excellent speed and precise outcomes. Before buying a plasma cutter, learning about its setup process is vital.
In a nutshell, you have learned how to set up a plasma cutter by reading the above 6 steps. Along with the correct setup procedure, a few other essential parameters like metal type and thickness, air compressor, etc. need to be considered. Only then you will get a precise cut.

